4. HOW DID YOU USE MEDIA TECHNOLOGIES IN THE CONSTRUCTION, PLANNING, RESEARCH AND EVALUATION STAGES?
Using YouTube
During the creation of our media project, there was a number of different technologies that were used by our group. During the production, the project was broken down into four main stages which were construction, planning, research and evaluation. One software we used was YouTube which was a great help in our A2 software. When making our trailer we needed to look at different aspects of different horror in which YouTube helped. We were able to watch trailers on youtube of all different genres and then take parts we found would benefit our work. YouTube was ideal as it allowed us to watch these trailers for free. We focused on new horrors as youtube had a variety of new uploads allowing us to see what was popular. YouTuve was a massive help when it came too extracting sound for our horror. Sound is catalytic in horror, without it horror would not would be as popular as it is today. Once again, due to YouTubes convenience we could take sound and use it in our A2 trailer straight away.
Using PicMonkey
PicMonkey proved to be a key tool for our A2 coursework. It allowed us to edit photos with ease, especially when it came too the poster and the magazine. We experimented with different shades and effects in hope it would make our image look darker. PicMonkey allowed us to do this without any hassle. Without PicMonkey we would have wasted a lot of time chopping and changing our pieces of coursework, as other programs aren't as quick and easy to use. PicMonkey also allowed us to play around with different text. We were unsure on what font we should use when it came to our poster, and PicMonkey helped massively when it came too deciding on a font that suited our piece. We used photoshop to edit the original image, although the one we used in the screencast was a practice and not our final image it was still key to practice and get used to using the software.
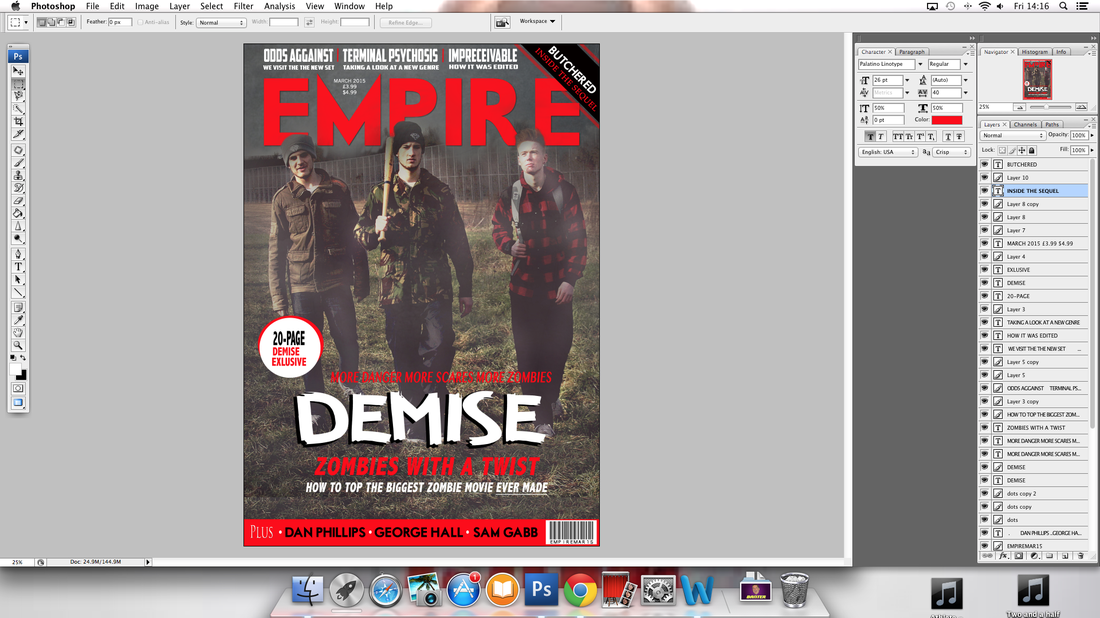
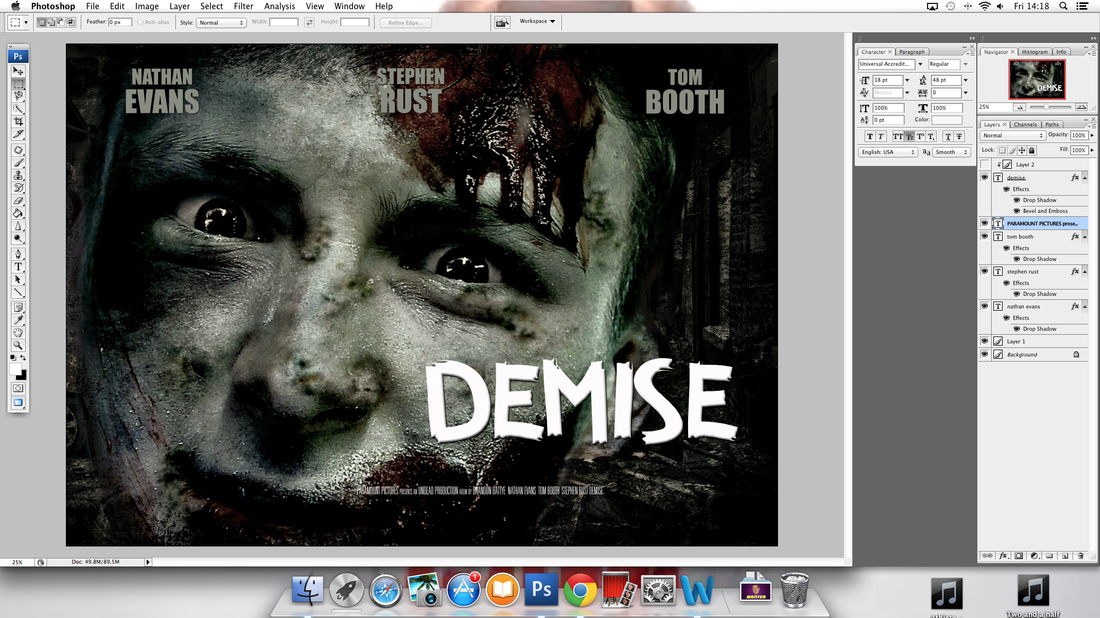
USING PHOTOSHOP
Photoshop helped us get a professional quality poster and magazine cover. After editing the image slightly on pic monkey it was more effective to move onto Photoshop. Photoshop allowed us to add our background into the image and make it look dark and gloomy.Over a period of time getting to grips with this program was challenging but gave us great effects. When researching magazine covers and movie posters Photoshop helped us to achieve a good quality end product to compete against other brands. Photoshop allowed us to create different layers of images and text. Photoshop also helped us create our brand identity of the mask and the video diary.
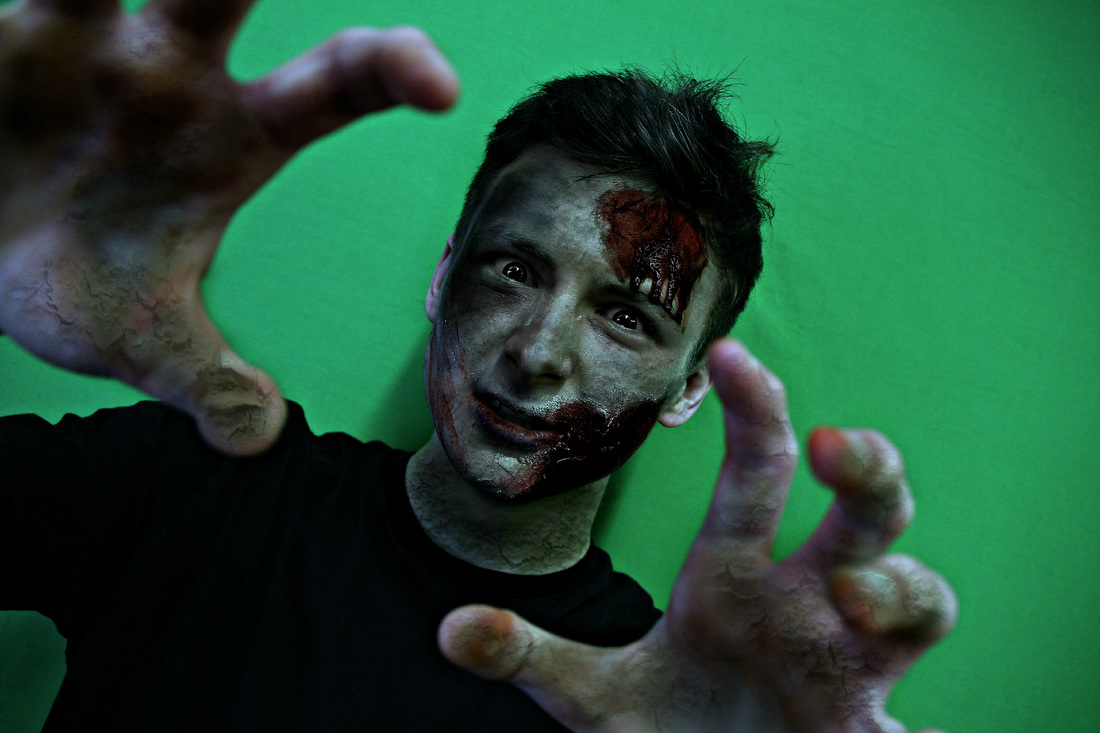
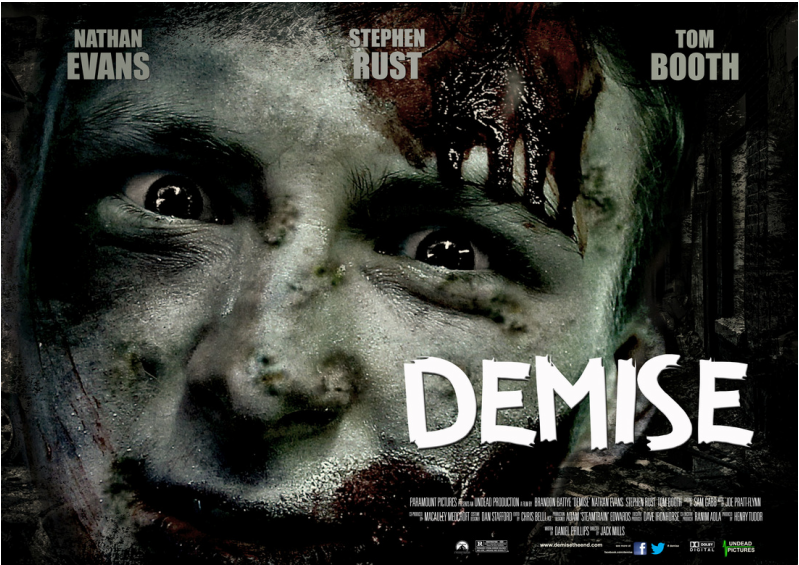
USING GREEN SCREEN
Green screen allowed us to expand our skills when constructing a poster, magazine cover and making videos to evaluate of work. It was particularly effective for our poster as we needed a focused picture of a zombie to the place on our background image. This was made simpler using the green screen. The help of the Green screen let us show different ways of evaluating our work. This was a new type of technology we used to make our evaluation more interesting and intriguing. it also gave us the chance to play our trailer and clips behind the interviewe where they would speak about individual parts of the trailer. The green allowed us to make simple videos to make the evaluation more effective.
|
|
USING PREZZI
The internet based program prezzi helped us to make all kinds of presentations to a professional standard. Prezi helped us present information on our website to show different topics we've explored. When evaluating our work we found that Prezi let us show a presentation in a simple yet effective way to show what we've found out.
|
|
CONSTRUCTION
The construction stage of the project consisted of our group making the actual horror trailer, magazine cover and movie poster.
Whilst making our horror movie's trailer; our group had to film the footage, then upload the footage via a memory card onto a designated computer. The footage would then be saved onto a the computer, then a program on the computer would allowed us to edit the footage and compile various clips together to then create our horror-movie trailer. The first piece of technology we used for this stage was a memory card. Our group would have our own memory card assigned to us, for us to use in any camera we decided to film our footage with. The memory card would then save the footage filmed on the camera and store it there. We would then insert the memory card into our groups assigned computer. On the computer, we would be able to copy and save the clips from the memory card and store them onto the computer. In order to make this stage work, we needed footage to store onto the actual memory card to the save onto the computer. Therefore, arguably the most important technology of this stage, was the camera. Whilst using the camera, we also needed a camera tripod for the camera to be secured to. This was so the camera would be steady during filming, although there is a filming technique that uses this style of hand-held camera recording, this was not the style our group wanted to emulate. This is because of the perspective of our trailer NOT being from a hand held recording. We felt that hand held recording in the context of our trailer would make it look unprofessional. The actual camera itself was a HD (High Definition) capable camera with a memory card slot. The high definition was an important feature of the camera as it again factored towards the professional look of our trailer. If the definition of the footage is poor, then the overall quality of the trailer will look poor and will be heavily damaging towards the general success of the trailer. The memory card slot was also important due to the importance of the role of the memory card (which is previously stated). All of the footage gathered by the camera and then stored onto a memory card would then be uploaded onto a computer that was assigned to our group. The computer was also an extremely key component in the construction of our trailer because it is where all the footage from the memory card would then be uploaded and edited to become our final. This would be the case for the horror trailer itself, and both the magazine cover and movie poster. After footage was saved onto the computer, it would be combined and edited on an editing software called 'Final Cut'. Final cut is a user friendly editing software that allows footage stored onto the computer to be placed on a timeline where it can be manipulated in a wide variety of ways, to become our finished trailer. This technology again was an essential part of the construction process as it turned all of our footage into being usable and effective content for our trailer. Without this software, the footage would be essentially unusable in our final trailer. The trailers audio would only be audio that was picked up by the camera, there would be no transitions between different scenes and shots, and there would be no visual effects whatsoever- and the trailer would only show exactly what the camera lense picked up! A trailer lacking all of this; especially considering our lack of resources such as props, costumes and makeup, would look extremely unprofessional, and unconvincing.
Whilst making both the movie poster our group needed to; take a picture on a camera as a base to work with, upload the photos we took and decide which we would use as our final image, edit/Photoshop the image so it looked professional and convincing and finally make additions to the image to make it look like a real life horror-movie poster. The first task in this stage was to take a photo for our main image for the movie poster. To do this our group needed a camera. The camera that we used was a very high quality and provided a very high quality image. This was essential in constructing a product that looked professional and high quality. The camera also needed to have a slot for a memory card in order for our group to save the photos we had taken and to upload them onto a computer. After taking a number of photos we put the memory card into the computer, we then decided which picture our group were going to use for the final image. We then used an online photo-editor called 'PicMonkey'. PicMonkey allowed us to add effects to picture, alter the colours and even add filters and backgrounds to the picture. This was a very important tool in making the picture usable as our final poster. PicMonkey itself is very easy to use and offers a huge verity of way to alter an image. PicMonkey can also be used on any photo uploaded from the computer. After saving the edited version of the image created on PicMonkey, we finalised the image on a Photoshop software called Photoshop CS3. This Photoshop software was very professional which was again very important in giving our product a professional an high quality finish. The Photoshop software allowed our group to add finalising titles/credits etc. to make the poster look like a real life horror-movie poster.
Whilst making the magazine cover our group also needed the same technologies at we did for the poster. this included both the camera/tripod, memoery card,computer and photo editing softwares such as photoshop cs3 and picmonkey.
Facebook was an important tool in finding feedback about our media product as Facebook covers a large range of audiences. Facebook also lets people write their own feedback in the comments which makes it easy to analyse .Whilst posting our content on Facebook, we received numerous comments and feedback most of which stated peoples opinions, likes and dislikes of our trailer. One of the most popular opinions expressed enthusiasm in our trailers sound track; although one or two suggestions were mentioned about the sound levels the general feedback was good in terms of the soundtrack. This means that this means that our group considered the appropriate soundtrack well; it is important to choose an appropriate soundtrack that fits with the trailer because it is a key element in setting the atmosphere we hope to achieve. The soundtrack was decided as one of five most important factors in a horror trailer by our group, prior to planning our project. We would take this feedback into consideration and work on fixing the sound levels since it was something that was mentioned in the feedback, as well as its importance in making a successful trailer.
